How to film outdoor adventures on your phone: a non-videographer's guide
You already own the best camera for marketing your outdoor business. It’s the phone in your pocket, and it’s been on every trip you’ve ever guided.
The gap between “I should be filming this” and actually getting usable footage feels wide when you’ve never touched a video editor or owned a gimbal. It isn’t. Your phone shoots 4K, handles slow motion, and fits in a dry bag. You don’t need better equipment. You need a few repeatable habits that turn raw clips into content your future guests watch before they book.
What follows is the stuff that actually moves the needle: settings, cheap gear, and techniques that make phone-shot trip footage good enough for your website and social feeds.
Pick the right settings before you leave the truck
Most people open their camera app, hit record, and hope for the best. That’s fine for personal memories. For content going on your trip pages or social accounts, a few setting changes go a long way.
Set your resolution to 4K. Every phone made after 2020 supports it, and the extra detail gives you room to crop or stabilize in editing without losing clarity. Set your frame rate to 24 frames per second for main footage. That’s the standard for film, and it gives clips a smoother, less “home video” feel than the 30fps default.
Switch to 120fps or 240fps when you want slow motion. A paddle hitting whitewater at half speed. A fly line unrolling over a river. A mountain biker clearing a rock garden. Those are the clips that stop someone mid-scroll.
Lock your exposure and focus by tapping and holding on your subject. If you let the phone handle exposure automatically, it constantly readjusts as clouds pass or you pan from shade to sunlight, and the footage looks jittery. One tap-and-hold fixes that.
Shoot in landscape orientation. Horizontal video works on your website, YouTube, and Google search results. Vertical works on Reels and TikTok. If you have to pick one, go horizontal. You can crop horizontal footage into a vertical frame later, but you can’t go the other direction.
Hold the phone like you mean it
The shakiest footage comes from holding your phone with one hand at arm’s length while walking. Nobody’s watching more than a few seconds of that.
Hold with both hands. Tuck your elbows into your ribs. When you need to pan across a landscape or follow a raft through a rapid, rotate your whole torso instead of swinging your arms. The frame stays steady, the movement stays smooth.
Walk heel-to-toe when filming on the move, almost like you’re sneaking. Bend your knees slightly. It sounds ridiculous, but it absorbs the bounce that turns a trail walkthrough into unwatchable shaky cam.
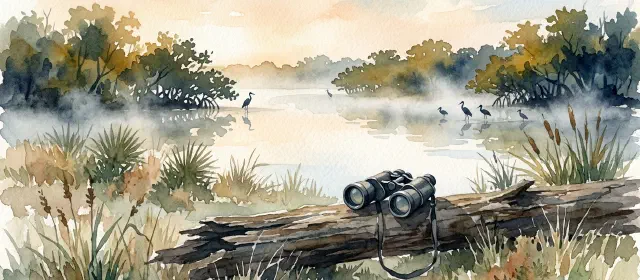
On water, brace the phone against something solid. Gunwale of a canoe, frame of a raft, cockpit rim of a kayak. Contact with a hard surface does more for stability than any software trick your phone offers.
Aqua Bound, the paddle manufacturer, has a whole tutorial library on filming kayak and canoe trips with phones and small cameras. Their approach: mount low, brace often, keep clips under 15 seconds so you can cut the shaky parts in editing.
Film during the hours that make everything look good
Light matters more than any setting or piece of gear. The same stretch of river looks flat and washed out at noon and looks like a tourism ad at 7 a.m.
The hour after sunrise and the hour before sunset produce soft, warm, directional light. Photographers call it golden hour. It’s the single easiest way to make phone footage look polished without changing anything else about your process. The light just does the work.
Midday sun creates harsh shadows on faces and blows out highlights on water. If you have to shoot at noon, find shade or position your subject so the sun sits behind a cloud or a tree line.
Overcast days are actually decent for filming. The clouds act as a giant diffuser. You won’t get dramatic shadows, but you also won’t get blown-out skies or squinting guests. Whitewater outfitters in the Pacific Northwest, where gray skies are the default, often produce some of the most watchable trip footage online for exactly this reason.
Spend forty dollars on gear that actually matters
You don’t need a $500 gimbal or a cinema rig. A few cheap accessories cover most outdoor filming situations.
A phone gimbal in the $80 to $150 range, like the DJI Osmo Mobile SE or the Zhiyun Smooth Q4, stabilizes footage in ways handheld technique can’t match. The Zhiyun folds small enough to clip to a pack strap. If that’s still more than you want to spend, a basic handheld grip with a cold shoe mount runs about $15 on Amazon and at least gives you a steadier handle.
A clip-on lavalier microphone for $20 to $40 fixes the biggest quality problem in outdoor video: wind noise. Audiences will tolerate grainy video. They won’t sit through muffled audio with wind roaring over every word. A lav mic clipped to your guide’s collar, paired with a foam windscreen, captures clear voice audio even in a breeze. For post-trip guest testimonials, this one accessory is the difference between usable and unusable.
A waterproof phone case rated IP68 or better costs $15 to $30. That means you can film on the water without worrying about a splash killing your phone. Several rafting outfitters on the Colorado River film their entire social feeds with phones in waterproof cases clipped to PFD shoulder straps. The footage isn’t cinematic. It books trips.
Plan your shots like you plan your trip itinerary
The biggest difference between footage that rots in your camera roll and footage that ends up on your website is having a plan before you press record.
Before a trip, write down five to seven shots you want. Not a storyboard. Just a list. Guests arriving and gearing up. The safety talk. The first big rapid or scenic overlook. A close-up of someone’s face mid-experience. A wide landscape shot. The group at the end.
Terradrift, an outdoor content platform run by two creators who shoot exclusively on phones, plans around “moments” rather than trying to film everything. Pick the three or four moments that define the experience and film those well. Don’t run the camera for hours hoping something usable turns up.
Shoot more than you think you need. The ratio for outdoor video is roughly five minutes of raw footage for every 30 seconds of finished content. Be generous with the record button and ruthless in editing. Most outfitters post too-long clips and then wonder why nobody watches. The fix is deleting 90 percent of what you shot.
Once you have clips, they need a home. Embed short videos directly on your trip pages and blog posts where they support the booking decision. A 60-second trip preview on a trip page does more for conversions than a polished three-minute brand film buried on a YouTube channel nobody visits.
Edit fast and keep it short
Editing is where most non-videographers get stuck. The footage sits on the phone for weeks because opening a video editor feels like a commitment.
Use CapCut or the free version of InShot. Both are phone-based editors that handle trimming, simple transitions, music tracks, and full-resolution export. You don’t need a computer. You don’t need Final Cut or Premiere.
The Hobnail Trekking Company produces cinematic-looking videos of multi-day treks shot entirely on phones. Their editing process has three steps: pick the best clips, trim each one to its strongest two to five seconds, arrange them in chronological order over a single music track. No text overlays. No fancy transitions. No color grading. The footage works because the shots were planned well.
Keep finished videos under 60 seconds for social and under 90 seconds for your website. A tight 45-second trip highlight reel will outperform a meandering five-minute video every time. If you want to understand how video length affects your search rankings, knowing how often to publish helps you set a realistic cadence.
Turn one trip into a week of content
A single guided trip can produce enough footage for five or more separate pieces of content if you plan for it.
From one morning of filming, you can pull a 45-second highlight reel for your trip page, three to five individual Reels or TikToks (one per moment), a still frame grabbed from a 4K clip for your blog or social image, a 15-second looping clip for your website hero section, and a guest testimonial if you recorded one at the takeout.
One trip. Content for your website, Instagram, TikTok, Google Business Profile, and email newsletter. The phone never leaves your pocket on the drive home because the work happened during the trip.
The outfitters who build a consistent video presence aren’t the ones with the best gear or the most free time. They’re the ones who decided filming three to five planned shots per trip is part of the job, same as loading the trailer and checking the gear. Once filming becomes routine instead of a project, the content just shows up.