ADA-compliant outdoor recreation websites: an accessibility checklist

A single ADA demand letter costs an outdoor business $5,000 on average. If it goes to court, that number jumps to $85,000. And in 2025, federal accessibility lawsuits surged 37% year over year, with 67% of them targeting companies under $25 million in revenue. Your rafting company, your guide service, your lodge - you’re exactly the size plaintiff attorneys are looking for.
The good news: most accessibility fixes aren’t complicated. They’re just overlooked. This checklist walks you through the specific changes that make your outdoor recreation website ADA compliant, protect you from litigation, and (here’s the part nobody talks about) actually get you more bookings from the 27% of US adults living with a disability.
What ADA compliance actually means for your website
ADA Title III applies to “places of public accommodation.” Courts have consistently ruled that websites count, especially if you sell services online. There’s no small business exemption. If you take bookings through your site, you’re covered.
The standard everyone references is WCAG 2.1 Level AA. It’s built around four principles that form the acronym POUR: perceivable, operable, understandable, and robust. Those sound abstract, so here’s what they mean for a fishing charter or zip line company:
Perceivable means a blind visitor using a screen reader can understand every piece of content on your site. Your trip photos need alt text. Your videos need captions. Your pricing tables need proper markup.
Operable means someone who can’t use a mouse can still book a trip using only a keyboard. Every button, every dropdown, every date picker in your booking flow needs to work with Tab and Enter keys alone.
Understandable means your forms tell people what went wrong when they make an error, your navigation is consistent, and your language is clear.
Robust means your code plays well with assistive technology like screen readers, switch devices, and voice control software. Clean HTML and proper ARIA labels make this happen.
Your booking widget is probably the weakest link
Most outfitters use third-party booking platforms like FareHarbor, Peek Pro, or Xola. You picked one, embedded the widget, and moved on. But that widget is where accessibility breaks down fastest.
Here’s what to test on your booking widget right now. Open your trip page. Unplug your mouse. Try to book a trip using only your keyboard. Can you select a date? Can you choose the number of guests? Can you get through checkout? If you get stuck anywhere, a screen reader user is stuck too.
We’ve seen outfitters who pass every accessibility check on their main pages but completely fail at checkout because their booking widget traps keyboard focus inside a date picker with no escape. That one widget issue is enough for a lawsuit.
Contact your booking platform’s support team and ask specifically about their WCAG 2.1 AA conformance. FareHarbor, Peek, and Xola all claim accessibility improvements in recent years, but the implementation varies by widget version and configuration. Get it in writing. If they can’t provide a VPAT (Voluntary Product Accessibility Template), that tells you something.
For a deeper look at how these platforms handle SEO and crawlability, check out our comparison of FareHarbor, Peek Pro, and Xola. Accessibility and crawlability problems often overlap.
The image alt text checklist for adventure photography
Outdoor recreation sites are image-heavy. That’s good for conversions and terrible for accessibility when every photo has alt text that says “IMG_4392.jpg” or nothing at all.
Writing alt text for adventure photos requires a different approach than writing it for product images. You’re not describing a shoe. You’re describing an experience. Here’s how to do it well:
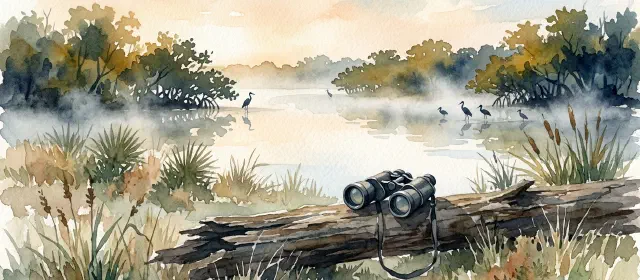
For trip photos, describe the activity, the setting, and the conditions. “Four guests in a raft running Class III rapids on the Gauley River in autumn” is useful. “Rafting photo” is not. “Fun times on the river” is useless to someone who can’t see the image.
For hero images on trip pages, the alt text should reinforce what the page is about. If the page sells a half-day kayak tour on Lake Tahoe, the alt text on the hero image should mention kayaking and Lake Tahoe.
For decorative images (background textures, divider graphics, purely aesthetic photos), use empty alt text (alt=""). Screen readers will skip them, which is exactly what you want. Don’t make a blind user sit through descriptions of your wood-grain background pattern.
Your adventure photos probably also need compression and proper sizing, which affects both accessibility and page speed. Our guide to how adventure photos affect Core Web Vitals covers the performance side.
Forms, error messages, and the checkout flow
Every form on your site needs three things to be accessible. Contact forms, booking forms, waiver signatures, newsletter signups: all of them.
First, every input field needs a visible label. Placeholder text that disappears when you start typing doesn’t count. A screen reader user needs to know whether they’re typing their name, email, or phone number, and placeholder text often gets skipped by assistive technology.
Second, error messages need to be specific and programmatically associated with the field that has the problem. “Please fix the errors below” with red highlighting means nothing to someone who can’t see red. “Phone number must include area code” connected directly to the phone field. That works.
Third, your form’s tab order should follow a logical sequence. First name, last name, email, phone, submit. Not a random jump from email to zip code to first name because your form builder laid things out in two columns that read left-to-right visually but top-to-bottom in the code.
Test every form on your site with the keyboard-only method. Tab through each field. Make sure focus indicators (the outline showing which field is active) are visible. Submit with intentional errors and check that the error messages make sense without seeing the page layout.
Why accessibility overlays won’t protect you
You’ve probably seen the pitch: install a single line of JavaScript and your site becomes ADA compliant. Companies like accessiBe, UserWay, and AudioEye sell these overlay widgets. They’re tempting because they cost $50-500 a month and promise instant compliance.
They don’t deliver. In the first half of 2025, 22.6% of all web accessibility lawsuits (456 cases) targeted websites that already had an overlay installed. The FTC fined accessiBe $1 million for misleading businesses about what their product actually does. Courts have explicitly rejected overlays as evidence of compliance.
The problem is structural. Overlays sit on top of your existing code without fixing it. They often interfere with the screen readers and assistive technology that disabled users already have configured. Installing an overlay actually signals to plaintiff attorneys that you knew about your accessibility obligations and chose a shortcut. That’s worse than doing nothing in some courts’ eyes.
Spend the overlay subscription money on actual fixes instead. A freelance developer who understands WCAG can audit your site for $500-2,000 and fix the most critical issues. That’s real protection. An overlay is a legal target painted on your homepage.
The 30-minute accessibility self-audit
You don’t need to hire a consultant to find your biggest problems. Run through this audit yourself. It takes about 30 minutes.
Start with an automated scan. Run your homepage and one trip page through WAVE (wave.webaim.org). It’s free. It won’t catch everything, but it’ll flag missing alt text, empty links, low contrast text, and missing form labels. Fix everything it marks as an error.
Next, do the keyboard test on your three most important pages: homepage, your most popular trip page, and your booking/checkout flow. Tab through every interactive element. Can you reach everything? Can you see where your focus is? Can you open and close menus? Can you complete a booking?
Then check your color contrast. Grab a contrast checker tool (WebAIM’s contrast checker is free). Your body text needs a 4.5:1 contrast ratio against its background. Headers need 3:1. That light gray text on a white background that your designer loved? It probably fails. So does white text on bright outdoor photography without a dark overlay.
Finally, check your headings. View your page source or use an accessibility tool to see your heading structure. You should have one H1 per page, H2s for main sections, H3s for subsections, in order. Skipping from H1 to H4 is like removing every other step on a staircase for someone navigating by headings.
If you’re also planning a broader site structure review, our guide to the five pages every outdoor website needs covers the foundational architecture.
Accessible trip descriptions that actually help
Writing trip descriptions accessibly goes beyond just having alt text on photos. It means your descriptions need to communicate the physical experience clearly enough that someone with a disability can make an informed decision about whether the trip works for them.
State what the physical requirements actually are. “Moderate difficulty” means different things to different people. “Guests must be able to walk 2 miles on uneven terrain with 400 feet of elevation gain” is accessible information. “Must be reasonably fit” is not.
California State Parks built a searchable database of accessible features across every park - you can filter by wheelchair accessibility, sensory accommodations, and mobility requirements. That’s the gold standard. You probably don’t need a database, but a clear accessibility section on each trip page that states exactly what physical abilities are required, what accommodations you can provide, and who to contact with questions will serve your guests and protect your business.
Use descriptive link text throughout your site. “Click here” and “Learn more” tell a screen reader user nothing. “View the full-day rapids trip schedule” tells them exactly where they’re going.
Make accessibility part of your regular site maintenance
Accessibility isn’t a one-time project. Every new trip page, every seasonal photo update, every booking widget version change can introduce new issues.
Add accessibility checks to your content publishing process. When you upload a new trip photo, write the alt text before you hit publish. When you add a new form, test it with keyboard navigation before it goes live. When your booking platform pushes an update, run through the keyboard booking test again.
The April 2026 ADA Title II deadline for government websites is creating a wave of awareness and legal precedent that will spill over to private businesses. Plaintiff attorneys are building templates. AI tools are making it cheaper to file. The enforcement environment is tightening, not loosening.
Run that 30-minute self-audit this week. Fix the errors WAVE finds. Test your booking flow with just a keyboard. Those three steps alone will put you ahead of most outdoor recreation websites and make your site usable for every customer who wants to book a trip with you.